<?xml version="1.0" encoding="utf-8"?><feed xmlns="http://www.w3.org/2005/Atom" ><generator uri="https://jekyllrb.com/" version="4.4.1">Jekyll</generator><link href="https://hnyu.org/feed.xml" rel="self" type="application/atom+xml" /><link href="https://hnyu.org/" rel="alternate" type="text/html" /><updated>2025-12-27T19:58:34+08:00</updated><id>https://hnyu.org/feed.xml</id><title type="html">Home, Sweet Home</title><subtitle>Simplicity beats complexity.
</subtitle><author><name>Haonan YU</name><email>haonany@proton.me</email></author><entry><title type="html">There is no such thing as sleep</title><link href="https://hnyu.org/blog/2025/04/05/on-insomnia.html" rel="alternate" type="text/html" title="There is no such thing as sleep" /><published>2025-04-05T00:00:00+08:00</published><updated>2025-04-05T00:00:00+08:00</updated><id>https://hnyu.org/blog/2025/04/05/on-insomnia</id><content type="html" xml:base="https://hnyu.org/blog/2025/04/05/on-insomnia.html"><![CDATA[<blockquote>
  <p>“Ninety percent of success in life is just showing up.” ― Woody Allen</p>
</blockquote>

<p>For a long time I was troubled by insomnia.</p>

<p>I always tried to find a state called sleep. If not, I probably go check my phone or something, put myself in another state.</p>

<p>Last night was basically the same except I remind my good old childhood days, which I may not fell asleep but who cares, you are not allowed to wake, just be there.</p>

<p>And guess what, I slept just well, woke up at 6am.</p>

<p>I think that’s the answer, maybe I just go too hard on myself. Just be there, for sleep, learn and all other daily jobs, just be there.</p>]]></content><author><name>Haonan YU</name><email>haonany@proton.me</email></author><category term="blog" /><summary type="html"><![CDATA[“Ninety percent of success in life is just showing up.” ― Woody Allen]]></summary></entry><entry><title type="html">GitHub协作入门：从零开始的Git协作指南</title><link href="https://hnyu.org/blog/2025/03/22/intro-to-github-collab.html" rel="alternate" type="text/html" title="GitHub协作入门：从零开始的Git协作指南" /><published>2025-03-22T00:00:00+08:00</published><updated>2025-03-22T00:00:00+08:00</updated><id>https://hnyu.org/blog/2025/03/22/intro-to-github-collab</id><content type="html" xml:base="https://hnyu.org/blog/2025/03/22/intro-to-github-collab.html"><![CDATA[<p><img src="https://upload.wikimedia.org/wikipedia/commons/thumb/f/f4/Git_session.svg/2880px-Git_session.svg.png" alt="Git工作流程" /></p>

<p>GitHub已成为全球开发者协作的标准平台。无论你是程序员、设计师还是内容创作者，掌握Git和GitHub的基础知识都能显著提升你的团队协作效率。本文将为Git新手提供一份实用指南，从环境设置到日常协作流程。</p>

<h2 id="什么是git和github">什么是Git和GitHub？</h2>

<ul>
  <li><strong>Git</strong>：一个分布式版本控制系统，追踪文件变化，允许多人协作开发</li>
  <li><strong>GitHub</strong>：基于Git的云托管平台，提供图形界面和额外协作功能</li>
</ul>

<h2 id="第一步环境设置">第一步：环境设置</h2>

<h3 id="安装git">安装Git</h3>

<ol>
  <li>访问<a href="https://git-scm.com/downloads">Git官网</a>下载适合你操作系统的版本</li>
  <li>安装时保持默认选项即可</li>
  <li>安装完成后，打开终端/命令行，输入<code class="language-plaintext highlighter-rouge">git --version</code>确认安装成功</li>
</ol>

<h3 id="创建github账号">创建GitHub账号</h3>

<ol>
  <li>访问<a href="https://github.com">GitHub</a></li>
  <li>点击”Sign up”并按提示完成注册</li>
  <li>验证邮箱地址</li>
</ol>

<h3 id="接受协作邀请">接受协作邀请</h3>

<p>如果项目负责人已将你添加为协作者，你会收到一封邮件邀请。</p>

<ol>
  <li>点击邮件中的邀请链接或访问通知中心</li>
  <li>接受邀请后，项目负责人会告知你需要克隆和操作的具体仓库</li>
  <li>按照指示克隆指定仓库并进行后续操作</li>
</ol>

<h2 id="设置ssh密钥">设置SSH密钥</h2>

<p>SSH密钥让你能安全地连接GitHub，无需每次操作都输入用户名密码。<strong>从2021年8月13日起，GitHub已不再支持密码验证，必须使用SSH密钥或个人访问令牌(PAT)进行身份验证。</strong></p>

<h3 id="生成ssh密钥">生成SSH密钥</h3>

<ol>
  <li>打开终端/命令行（Windows上使用PowerShell）</li>
  <li>输入以下命令：
    <div class="language-bash highlighter-rouge"><div class="highlight"><pre class="highlight"><code>ssh-keygen <span class="nt">-t</span> ed25519
</code></pre></div>    </div>
    <p><strong>说明：</strong> <code class="language-plaintext highlighter-rouge">-t ed25519</code> 指定使用Ed25519算法，这是GitHub目前推荐的更安全、更现代的密钥类型。</p>

    <p><strong>兼容性提示：</strong> 如果你使用的是较旧的系统不支持Ed25519，可以使用RSA：<code class="language-plaintext highlighter-rouge">ssh-keygen -t rsa -b 4096</code></p>
  </li>
  <li>当提示”Enter a file in which to save the key”时，直接按Enter接受默认位置</li>
  <li>可以设置密码短语，也可以直接按Enter跳过</li>
</ol>

<h3 id="添加公钥到github">添加公钥到GitHub</h3>

<ol>
  <li>复制SSH公钥内容：
    <div class="language-bash highlighter-rouge"><div class="highlight"><pre class="highlight"><code><span class="c"># Windows (PowerShell)</span>
Get-Content ~/.ssh/id_ed25519.pub | Set-Clipboard
   
<span class="c"># macOS/Linux</span>
<span class="nb">cat</span> ~/.ssh/id_ed25519.pub
<span class="c"># 然后手动复制输出内容</span>
</code></pre></div>    </div>
  </li>
  <li>登录GitHub，点击右上角头像 → Settings → SSH and GPG keys</li>
  <li>点击”New SSH key”</li>
  <li>输入标题（如”我的电脑”）</li>
  <li>粘贴公钥内容到”Key”框</li>
  <li>点击”Add SSH key”</li>
</ol>

<h3 id="测试连接">测试连接</h3>

<div class="language-bash highlighter-rouge"><div class="highlight"><pre class="highlight"><code>ssh <span class="nt">-T</span> git@github.com
</code></pre></div></div>

<p>看到”Hi username! You’ve successfully authenticated…“表示成功。</p>

<p>⚠️ <strong>大陆用户注意</strong>：由于网络环境限制，连接GitHub可能不稳定。可以考虑使用代理工具，具体方法请根据个人情况自行解决，本文不提供详细教程。</p>

<h2 id="git基础操作">Git基础操作</h2>

<h3 id="配置用户信息">配置用户信息</h3>

<div class="language-bash highlighter-rouge"><div class="highlight"><pre class="highlight"><code>git config <span class="nt">--global</span> user.name <span class="s2">"你的名字"</span>
git config <span class="nt">--global</span> user.email <span class="s2">"你的邮箱"</span>
</code></pre></div></div>

<h3 id="克隆仓库">克隆仓库</h3>

<div class="language-bash highlighter-rouge"><div class="highlight"><pre class="highlight"><code>git clone git@github.com:用户名/仓库名.git
</code></pre></div></div>

<h3 id="基本工作流程">基本工作流程</h3>

<ol>
  <li><strong>拉取最新代码</strong>：
    <div class="language-bash highlighter-rouge"><div class="highlight"><pre class="highlight"><code>git pull
</code></pre></div>    </div>
  </li>
  <li><strong>创建分支</strong>（可选）：
    <div class="language-bash highlighter-rouge"><div class="highlight"><pre class="highlight"><code>git checkout <span class="nt">-b</span> feature-name
</code></pre></div>    </div>

    <p><strong>提示：</strong> 对于小型项目或个人项目，可以直接在主分支上工作</p>
  </li>
  <li><strong>做出修改并提交</strong>：
    <div class="language-bash highlighter-rouge"><div class="highlight"><pre class="highlight"><code>git add <span class="nb">.</span>
git commit <span class="nt">-m</span> <span class="s2">"描述你的修改"</span>
</code></pre></div>    </div>
  </li>
  <li><strong>推送到远程</strong>：
    <div class="language-bash highlighter-rouge"><div class="highlight"><pre class="highlight"><code>git push origin feature-name
</code></pre></div>    </div>

    <p><strong>提示：</strong> 如果已经设置了当前分支跟踪远程分支，可以直接使用 <code class="language-plaintext highlighter-rouge">git push</code></p>
  </li>
  <li><strong>创建Pull Request</strong>：
    <ul>
      <li>访问GitHub仓库页面</li>
      <li>点击”Compare &amp; pull request”</li>
      <li>填写PR描述</li>
      <li>点击”Create pull request”</li>
    </ul>
  </li>
</ol>

<h2 id="协作最佳实践">协作最佳实践</h2>

<h3 id="分支管理">分支管理</h3>

<ul>
  <li><strong>main/master分支</strong>：稳定代码，通常受保护</li>
  <li><strong>feature分支</strong>：新功能开发</li>
  <li><strong>bugfix分支</strong>：修复问题</li>
  <li><strong>release分支</strong>：准备发布版本</li>
</ul>

<h3 id="有效的提交信息">有效的提交信息</h3>

<p>好的提交信息格式：</p>
<div class="language-plaintext highlighter-rouge"><div class="highlight"><pre class="highlight"><code>类型: 简短描述（50字符以内）

详细描述（可选，72字符换行）
</code></pre></div></div>

<p>类型可以是：feat（新功能）、fix（修复）、docs（文档）、style（格式）、refactor（重构）、test（测试）等。</p>

<h3 id="解决冲突">解决冲突</h3>

<p>当多人修改同一文件时可能发生冲突：</p>

<ol>
  <li><code class="language-plaintext highlighter-rouge">git pull</code>获取最新代码</li>
  <li>Git会标记冲突位置：
    <div class="language-plaintext highlighter-rouge"><div class="highlight"><pre class="highlight"><code>&lt;&lt;&lt;&lt;&lt;&lt;&lt; HEAD
你的修改
=======
别人的修改
&gt;&gt;&gt;&gt;&gt;&gt;&gt; branch-name
</code></pre></div>    </div>
  </li>
  <li>手动编辑文件解决冲突</li>
  <li><code class="language-plaintext highlighter-rouge">git add</code>标记为已解决</li>
  <li><code class="language-plaintext highlighter-rouge">git commit</code>完成合并</li>
</ol>

<h3 id="代码审查">代码审查</h3>

<ul>
  <li>提交PR后请求团队成员审查</li>
  <li>审查者应关注代码质量、逻辑和潜在问题</li>
  <li>保持建设性和尊重的沟通</li>
</ul>

<h2 id="高效latex工作流配置">高效LaTeX工作流配置</h2>

<p>在使用Git进行协作时，合理的编辑器配置能大幅提升工作效率。以下是推荐的VSCode LaTeX Workshop配置，特别适合需要处理学术论文的团队：</p>

<div class="language-json highlighter-rouge"><div class="highlight"><pre class="highlight"><code><span class="p">{</span><span class="w">
    </span><span class="nl">"latex-workshop.latex.tools"</span><span class="p">:</span><span class="w"> </span><span class="p">[</span><span class="w">
        </span><span class="p">{</span><span class="w">
            </span><span class="nl">"name"</span><span class="p">:</span><span class="w"> </span><span class="s2">"xelatex"</span><span class="p">,</span><span class="w">
            </span><span class="nl">"command"</span><span class="p">:</span><span class="w"> </span><span class="s2">"xelatex"</span><span class="p">,</span><span class="w">
            </span><span class="nl">"args"</span><span class="p">:</span><span class="w"> </span><span class="p">[</span><span class="w">
                </span><span class="s2">"-synctex=1"</span><span class="p">,</span><span class="w">
                </span><span class="s2">"-interaction=nonstopmode"</span><span class="p">,</span><span class="w">
                </span><span class="s2">"-file-line-error"</span><span class="p">,</span><span class="w">
                </span><span class="s2">"%DOC%"</span><span class="w">
            </span><span class="p">]</span><span class="w">
        </span><span class="p">},</span><span class="w">
        </span><span class="p">{</span><span class="w">
            </span><span class="nl">"name"</span><span class="p">:</span><span class="w"> </span><span class="s2">"bibtex"</span><span class="p">,</span><span class="w">
            </span><span class="nl">"command"</span><span class="p">:</span><span class="w"> </span><span class="s2">"bibtex"</span><span class="p">,</span><span class="w">
            </span><span class="nl">"args"</span><span class="p">:</span><span class="w"> </span><span class="p">[</span><span class="w">
                </span><span class="s2">"%DOCFILE%"</span><span class="w">
            </span><span class="p">]</span><span class="w">
        </span><span class="p">}</span><span class="w">
    </span><span class="p">],</span><span class="w">
    </span><span class="nl">"latex-workshop.latex.recipes"</span><span class="p">:</span><span class="w"> </span><span class="p">[</span><span class="w">
        </span><span class="p">{</span><span class="w">
        </span><span class="nl">"name"</span><span class="p">:</span><span class="w"> </span><span class="s2">"xe-&gt;bib-&gt;xe-&gt;xe"</span><span class="p">,</span><span class="w">
        </span><span class="nl">"tools"</span><span class="p">:</span><span class="w"> </span><span class="p">[</span><span class="w">
            </span><span class="s2">"xelatex"</span><span class="p">,</span><span class="w">
            </span><span class="s2">"bibtex"</span><span class="p">,</span><span class="w">
            </span><span class="s2">"xelatex"</span><span class="p">,</span><span class="w">
            </span><span class="s2">"xelatex"</span><span class="w">
            </span><span class="p">]</span><span class="w">
        </span><span class="p">}</span><span class="w">
    </span><span class="p">],</span><span class="w">
    </span><span class="nl">"latex-workshop.latex.recipe.default"</span><span class="p">:</span><span class="w"> </span><span class="s2">"xe-&gt;bib-&gt;xe-&gt;xe"</span><span class="p">,</span><span class="w">
    </span><span class="nl">"latex-workshop.latex.autoBuild.run"</span><span class="p">:</span><span class="w"> </span><span class="s2">"never"</span><span class="p">,</span><span class="w">
    </span><span class="nl">"git.enableSmartCommit"</span><span class="p">:</span><span class="w"> </span><span class="kc">true</span><span class="p">,</span><span class="w">
    </span><span class="nl">"git.autofetch"</span><span class="p">:</span><span class="w"> </span><span class="kc">true</span><span class="w">
</span><span class="p">}</span><span class="w">

</span></code></pre></div></div>

<p>这个配置主要解决了以下问题：</p>

<ol>
  <li><strong>编译流程自动化</strong>：设置了完整的XeLaTeX+BibTeX编译链，确保参考文献正确渲染</li>
  <li><strong>禁用自动构建</strong>：防止编辑大型文档时频繁触发编译</li>
  <li><strong>Git集成优化</strong>：启用智能提交和自动获取更新，简化协作流程</li>
</ol>

<p>将此配置添加到团队的<code class="language-plaintext highlighter-rouge">.vscode/settings.json</code>文件中并提交到仓库，可确保所有协作者使用一致的工作环境，减少因环境差异导致的问题。</p>

<h2 id="总结">总结</h2>

<p>Git和GitHub的学习曲线可能较陡，但掌握这些基础知识后，你将能够更高效地与团队协作。记住，熟能生巧——多实践是提高Git技能的最佳方式。</p>

<p>随着你的技能提升，可以探索更多高级功能，如GitHub Actions自动化工作流、GitHub Pages网站托管等。祝你协作愉快！</p>]]></content><author><name>Haonan YU</name><email>haonany@proton.me</email></author><category term="blog" /><summary type="html"><![CDATA[]]></summary></entry><entry><title type="html">Factorio</title><link href="https://hnyu.org/blog/2025/03/19/factorio-mindset-continuous-improvement.html" rel="alternate" type="text/html" title="Factorio" /><published>2025-03-19T00:00:00+08:00</published><updated>2025-03-19T00:00:00+08:00</updated><id>https://hnyu.org/blog/2025/03/19/factorio-mindset-continuous-improvement</id><content type="html" xml:base="https://hnyu.org/blog/2025/03/19/factorio-mindset-continuous-improvement.html"><![CDATA[<p><img src="/assets/images/facorio-gameplay.png" alt="Factorio gameplay" /></p>

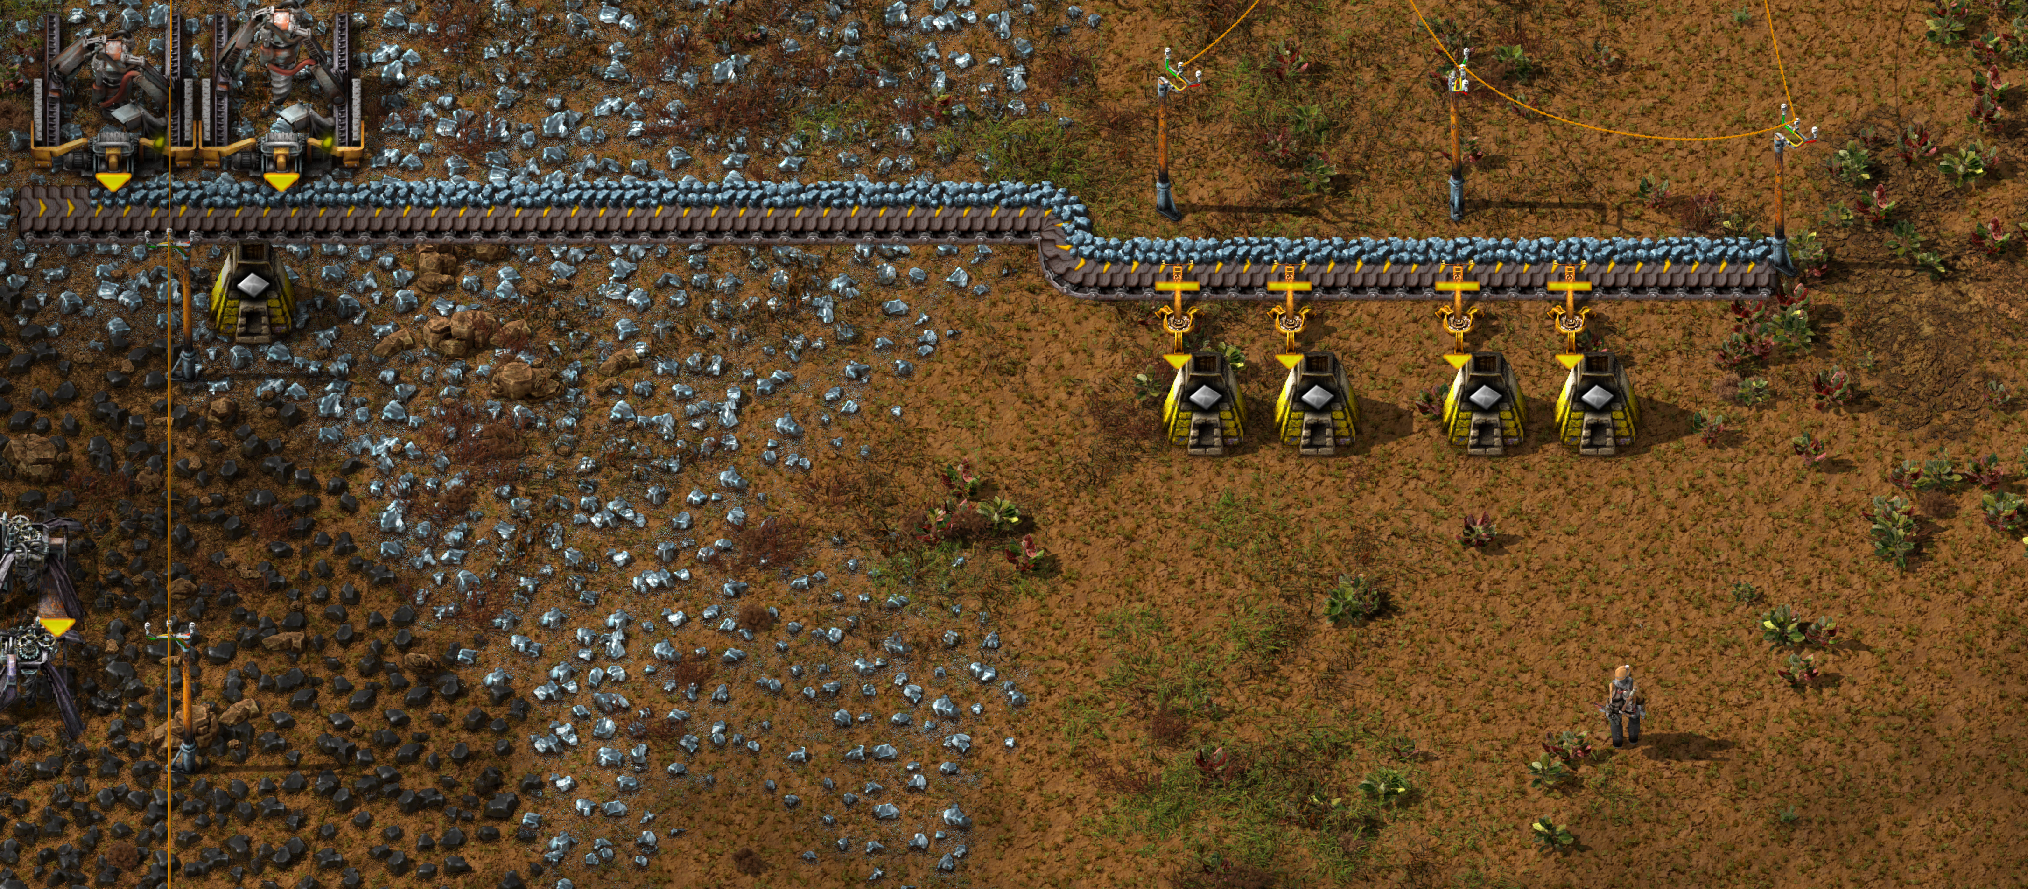
<p>Factorio is an automation game born in 2013 as a passion project by Prague-based Wube Software. The game places players on an alien planet where they must build and maintain factories while defending them from hostile native creatures.</p>

<p>Byrne Hobart <a href="https://www.thediff.co/archive/the-factorio-mindset/">describes this as a meditative game</a></p>

<hr />

<p>I find the process of building and optimizing factory systems in Factorio to be strangely calming. Despite the complexity of managing resources, production lines, and logistics networks, there’s something deeply satisfying about watching a well-designed factory operate efficiently. The game rewards systematic thinking and encourages players to continuously improve their designs—skills that translate well to real-world problem-solving.</p>

<h2 id="the-factorio-mindset-in-daily-life">The Factorio Mindset in Daily Life</h2>

<p>What fascinates me most about Factorio is how perfectly it mirrors real-life productivity challenges. When you start a new game, you’re forced to build suboptimal systems because:</p>

<ol>
  <li>You don’t yet have access to better tools</li>
  <li>You don’t fully understand what you’ll need in the future</li>
  <li>You’re still learning the relationships between different systems</li>
</ol>

<p>This mirrors our daily lives in profound ways. Think about any skill you’ve developed or system you’ve built:</p>

<ul>
  <li>When you first learn to code, you write messy, inefficient programs</li>
  <li>When you start a research project, your initial methodology will need refinement</li>
  <li>When you organize a workspace, your first layout rarely survives contact with actual use</li>
</ul>

<p>The key insight from Factorio that applies to life is this: <strong>you cannot build the optimal solution from the start because you don’t yet know what you want or need</strong>.</p>

<p>Instead, the process follows a natural evolution:</p>

<ol>
  <li>Build something basic that works (even if imperfectly)</li>
  <li>Use that system to gain resources and knowledge</li>
  <li>Identify bottlenecks and inefficiencies</li>
  <li>Refine your tools and processes</li>
  <li>Expand capabilities with your improved system</li>
  <li>Repeat the cycle</li>
</ol>

<p>The beauty of this approach—both in Factorio and in life—is that it embraces continuous improvement rather than expecting perfection from the start. This mindset reduces the paralysis that comes from trying to design the perfect system before taking any action.</p>]]></content><author><name>Haonan YU</name><email>haonany@proton.me</email></author><category term="blog" /><summary type="html"><![CDATA[]]></summary></entry><entry><title type="html">On the Shortification of Learning: Insights from Karpathy</title><link href="https://hnyu.org/blog/2025/03/19/learning-vs-entertainment-karpathy.html" rel="alternate" type="text/html" title="On the Shortification of Learning: Insights from Karpathy" /><published>2025-03-19T00:00:00+08:00</published><updated>2025-03-19T00:00:00+08:00</updated><id>https://hnyu.org/blog/2025/03/19/learning-vs-entertainment-karpathy</id><content type="html" xml:base="https://hnyu.org/blog/2025/03/19/learning-vs-entertainment-karpathy.html"><![CDATA[<h2 id="the-entertainment-vs-education-dilemma">The Entertainment vs Education Dilemma</h2>

<p>In today’s digital landscape, the line between education and entertainment continues to blur. Andrej Karpathy, former Tesla AI Director and OpenAI founding member, offers a thought-provoking perspective on this phenomenon:</p>

<center>
<blockquote class="twitter-tweet"><p lang="en" dir="ltr"># on shortification of &quot;learning&quot;<br /><br />There are a lot of videos on YouTube/TikTok etc. that give the appearance of education, but if you look closely they are really just entertainment. This is very convenient for everyone involved : the people watching enjoy thinking they are…</p>&mdash; Andrej Karpathy (@karpathy) <a href="https://twitter.com/karpathy/status/1756380066580455557?ref_src=twsrc%5Etfw">February 10, 2024</a></blockquote> <script async="" src="https://platform.twitter.com/widgets.js" charset="utf-8"></script>
</center>

<p>This observation resonates with my own experience navigating online learning resources. The most engaging content isn’t always the most educational, and true learning often requires effort that entertainment-focused content deliberately avoids.</p>]]></content><author><name>Haonan YU</name><email>haonany@proton.me</email></author><category term="blog" /><summary type="html"><![CDATA[The Entertainment vs Education Dilemma]]></summary></entry><entry><title type="html">Fixing Flash of Unstyled Content (FOUC) in Jekyll Sites</title><link href="https://hnyu.org/blog/2025/03/17/fixing-jekyll-fouc.html" rel="alternate" type="text/html" title="Fixing Flash of Unstyled Content (FOUC) in Jekyll Sites" /><published>2025-03-17T00:00:00+08:00</published><updated>2025-03-17T00:00:00+08:00</updated><id>https://hnyu.org/blog/2025/03/17/fixing-jekyll-fouc</id><content type="html" xml:base="https://hnyu.org/blog/2025/03/17/fixing-jekyll-fouc.html"><![CDATA[<h2 id="the-problem-flash-of-unstyled-content">The Problem: Flash of Unstyled Content</h2>

<p>If you’ve ever loaded a Jekyll site and noticed a brief flicker where unstyled HTML content appears before your CSS kicks in, you’ve experienced what web developers call a “Flash of Unstyled Content” or FOUC. This jarring visual glitch happens when your browser renders HTML content before the associated stylesheets have finished loading.</p>

<p>For Jekyll sites, this issue is particularly common because of how the platform processes and serves content. The browser starts rendering the HTML document as soon as it receives it, but external stylesheets might take a bit longer to download and parse.</p>

<h2 id="a-simple-but-effective-solution">A Simple but Effective Solution</h2>

<p>After experiencing this issue on my own Jekyll site, I implemented a minimal fix that completely eliminates the FOUC. The solution involves just a few lines of CSS and JavaScript and works by:</p>

<ol>
  <li>Initially hiding the entire page content</li>
  <li>Revealing the content only after all resources (including CSS) have loaded</li>
</ol>

<p>Here’s how I did it:</p>

<h3 id="step-1-modify-custom-headhtml">Step 1: Modify custom-head.html</h3>

<p>First, I added the following code to my <code class="language-plaintext highlighter-rouge">_includes/custom-head.html</code> file:</p>

<div class="language-html highlighter-rouge"><div class="highlight"><pre class="highlight"><code><span class="c">&lt;!-- Fix for Flash of Unstyled Content (FOUC) --&gt;</span>
<span class="nt">&lt;style&gt;</span>
  <span class="nc">.no-fouc</span> <span class="p">{</span>
    <span class="nl">visibility</span><span class="p">:</span> <span class="nb">hidden</span><span class="p">;</span>
  <span class="p">}</span>
<span class="nt">&lt;/style&gt;</span>
<span class="nt">&lt;script&gt;</span>
  <span class="nb">document</span><span class="p">.</span><span class="nx">documentElement</span><span class="p">.</span><span class="nx">className</span> <span class="o">=</span> <span class="dl">'</span><span class="s1">no-fouc</span><span class="dl">'</span><span class="p">;</span>
  <span class="nb">window</span><span class="p">.</span><span class="nf">addEventListener</span><span class="p">(</span><span class="dl">'</span><span class="s1">load</span><span class="dl">'</span><span class="p">,</span> <span class="kd">function</span><span class="p">()</span> <span class="p">{</span>
    <span class="nb">document</span><span class="p">.</span><span class="nx">documentElement</span><span class="p">.</span><span class="nx">className</span> <span class="o">=</span> <span class="dl">''</span><span class="p">;</span>
  <span class="p">});</span>
<span class="nt">&lt;/script&gt;</span>
</code></pre></div></div>

<p>This creates a CSS class that hides elements and sets up a JavaScript event listener that will remove this class once everything has loaded.</p>

<h3 id="step-2-apply-the-class-to-the-html-element">Step 2: Apply the class to the HTML element</h3>

<p>Then, I updated my <code class="language-plaintext highlighter-rouge">_layouts/base.html</code> file to add the class to the root HTML element:</p>

<div class="language-html highlighter-rouge"><div class="highlight"><pre class="highlight"><code><span class="cp">&lt;!DOCTYPE html&gt;</span>
<span class="nt">&lt;html</span> <span class="na">lang=</span><span class="s">"en"</span> <span class="na">class=</span><span class="s">"no-fouc"</span><span class="nt">&gt;</span>
</code></pre></div></div>

<h2 id="how-it-works">How It Works</h2>

<p>The solution works through these key mechanisms:</p>

<ol>
  <li>The <code class="language-plaintext highlighter-rouge">.no-fouc</code> CSS class sets <code class="language-plaintext highlighter-rouge">visibility: hidden</code> on any element it’s applied to</li>
  <li>We apply this class to the root <code class="language-plaintext highlighter-rouge">&lt;html&gt;</code> element through JavaScript immediately</li>
  <li>The <code class="language-plaintext highlighter-rouge">load</code> event listener waits until all page resources (HTML, CSS, JS, images, etc.) have finished loading</li>
  <li>Once everything is loaded, we remove the class, making the page visible</li>
</ol>

<h2 id="benefits-of-this-approach">Benefits of This Approach</h2>

<p>This solution has several advantages:</p>

<ul>
  <li><strong>Minimal code</strong>: Just a few lines of CSS and JavaScript</li>
  <li><strong>No dependencies</strong>: Doesn’t require jQuery or other libraries</li>
  <li><strong>Preserves page structure</strong>: Unlike some solutions that completely hide the body, this approach maintains the document flow, preventing layout shifts</li>
  <li><strong>Works with Jekyll’s default setup</strong>: No need to modify your build process</li>
</ul>

<h2 id="testing-your-fix">Testing Your Fix</h2>

<p>To confirm the fix works:</p>

<ol>
  <li>Open your site in a browser with the network throttled (in Chrome DevTools, use the Network tab to simulate a slow connection)</li>
  <li>Refresh the page</li>
  <li>You should see the page appear fully styled, with no interim unstyled content</li>
</ol>

<p>This simple solution provides a much better user experience by ensuring visitors only see your site when it’s fully styled and ready for presentation.</p>]]></content><author><name>Haonan YU</name><email>haonany@proton.me</email></author><category term="blog" /><summary type="html"><![CDATA[The Problem: Flash of Unstyled Content]]></summary></entry></feed>